The Heartfelt Sampler class is done! We started it in October and completed it right on time! I had seen the quilt somewhere online. The quilt was designed by a local quilter. She originally made the quilt for herself, which was displayed at a local quilt show. So many people asked for the pattern that she put together a pattern, which you can buy on her Etsy Shop. She also designed a mini version for those who did not want to make so many blocks!
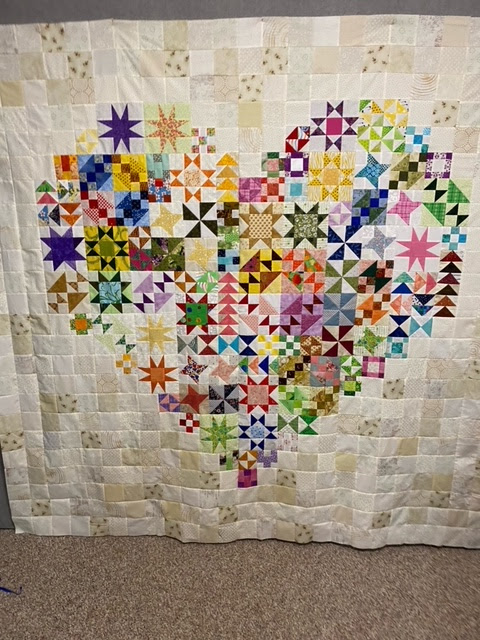
Here is Sandy's original quilt. Yes, I screen-captured that from the Etsy website! Notice the background is made up of small squares. In keeping with her name in the quilt world - Scrappy Gal Quilt Co.- she added words about "using up" in the border. The heart is soft and pretty; note there is NO outside border.
 |
| Sandy's quilt |
Now, let's see what the group did.
Let's start with the finished quilts. And by finished, I mean quilted and bound! This monochromatic version has words (they are there, but they are subtle), a final pink border, and a striped binding.
 |
| Sharon |
I'm not sure if it's the picture's orientation, but this one looks rectangular rather than square. The quilting on this one is almost completed. It's being done by hand, but notice that she has already bound it. That makes it look done! She added words, and I believe she said she wrote the words on with some sort of writing tool. I'll have to get more details on that.
 |
| Sharon |
This person made the edge of the heart pronounced by adding a border. It shows up very dark in the photo, but the fabric is NOT that dark. Then, to smooth the edge, she added half-square triangles. You can't tell from this photo, but the background fabric was so busy that she got away with sewing it in stripes rather than squares.
 |
| Katheleen |
In this picture, the quilt is not quilted, but the heart shows up better in this photo than the one I have of it quilted. The background of many blocks uses the same values/colors as the background, and this heart looks very lacey. It's delicate and very pretty. You cannot see it in the photo, but she had various words machine embroidered on some blocks. That is a beautiful and subtle way to add words to any quilt.
 |
| Brenda |
And there's ONE more that was quilted and bound. This is a very romantic version of the heart quilt. It's very soft and looks gorgeous. She custom quilted it so the background and the heart would stand out a bit more from each other.
So, five participants out of 29 completed the project. That's impressive!!!
Now, let's look at the quilt tops that were completed.
It's interesting how some people look at all the pictures and lament that they lack high contrast, too many weird colors, or whatever. But here's the thing. We should embrace our quilts, figure out why we don't like them or why we like them, and use that as a learning experience for the next project.
Many people used scraps for the entire quilt! Some had to piece fabric together to create large enough pieces, or they changed things as they went along, as in this next quilt. She had run out of the medium-to-dark value for the last blocks, so she added in some lighter backgrounds, which I think makes the quilt much more interesting!
 |
| Sheila |
The above quilt did not have words. It was interesting to see the dilemma many faced—words or no words. And if words will be added, how will I get them on the quilt?
The next quilter used the same background fabric for the entire quilt, although she cut it up into squares and sewed them back together again. I think that keeps with the scrappy theme. Then, a final border of green. This is a curated scrap quilt in that she chose greens, gold, and a few other colors, but it was a restricted color palette.
 |
| Pauline |
Here's another one that is soft in values. It's OK to have a quilt that doesn't have a lot of content! She initially did not plan to put words on the quilt, but after seeing what others have done, she may rethink that!
 |
| Marg |
This person was absolutely not going to put words on her quilt, but then she thought outside the box and added words!! The words are pieced together, and I love the effect. Some people changed the style of the words (piecing versus applique), and they came up with their own words.
 |
| Karen |
A very bright and cheery version. Isn't it amazing how different they look depending on the value and colors chosen? She ran out of neutral backgrounds, so she added in a couple with a bit of a pattern. Hey -- that works!!!
 |
| Lorna |
Here's an example of another dilemma we had to deal with. How do you deal with the bottom border when you put the words around the quilt's perimeter? There is a very soft border of grey surrounding the heart.
 |
| Heather |
This person used the same fabric for the background and sewed it in strips, which works. Once that is quilted, no one will be the wiser.
 |
| Nancy |
That freed up some time, so she also made the mini.
 |
| Nancy |
Here's one more quilt top. It was fascinating to see all the finished quilts and tops!! It's a large quilt, so getting a picture of the entire thing is hard. This person used machine embroidery applique to add the words.
 |
| Louise |
Here's another quilt. The owner was NOT going to put words on it, but after she got the top together, she said, "Why not?" It looks fantastic; the colors are curated, so it has a defined color palette.
 |
| Donna |
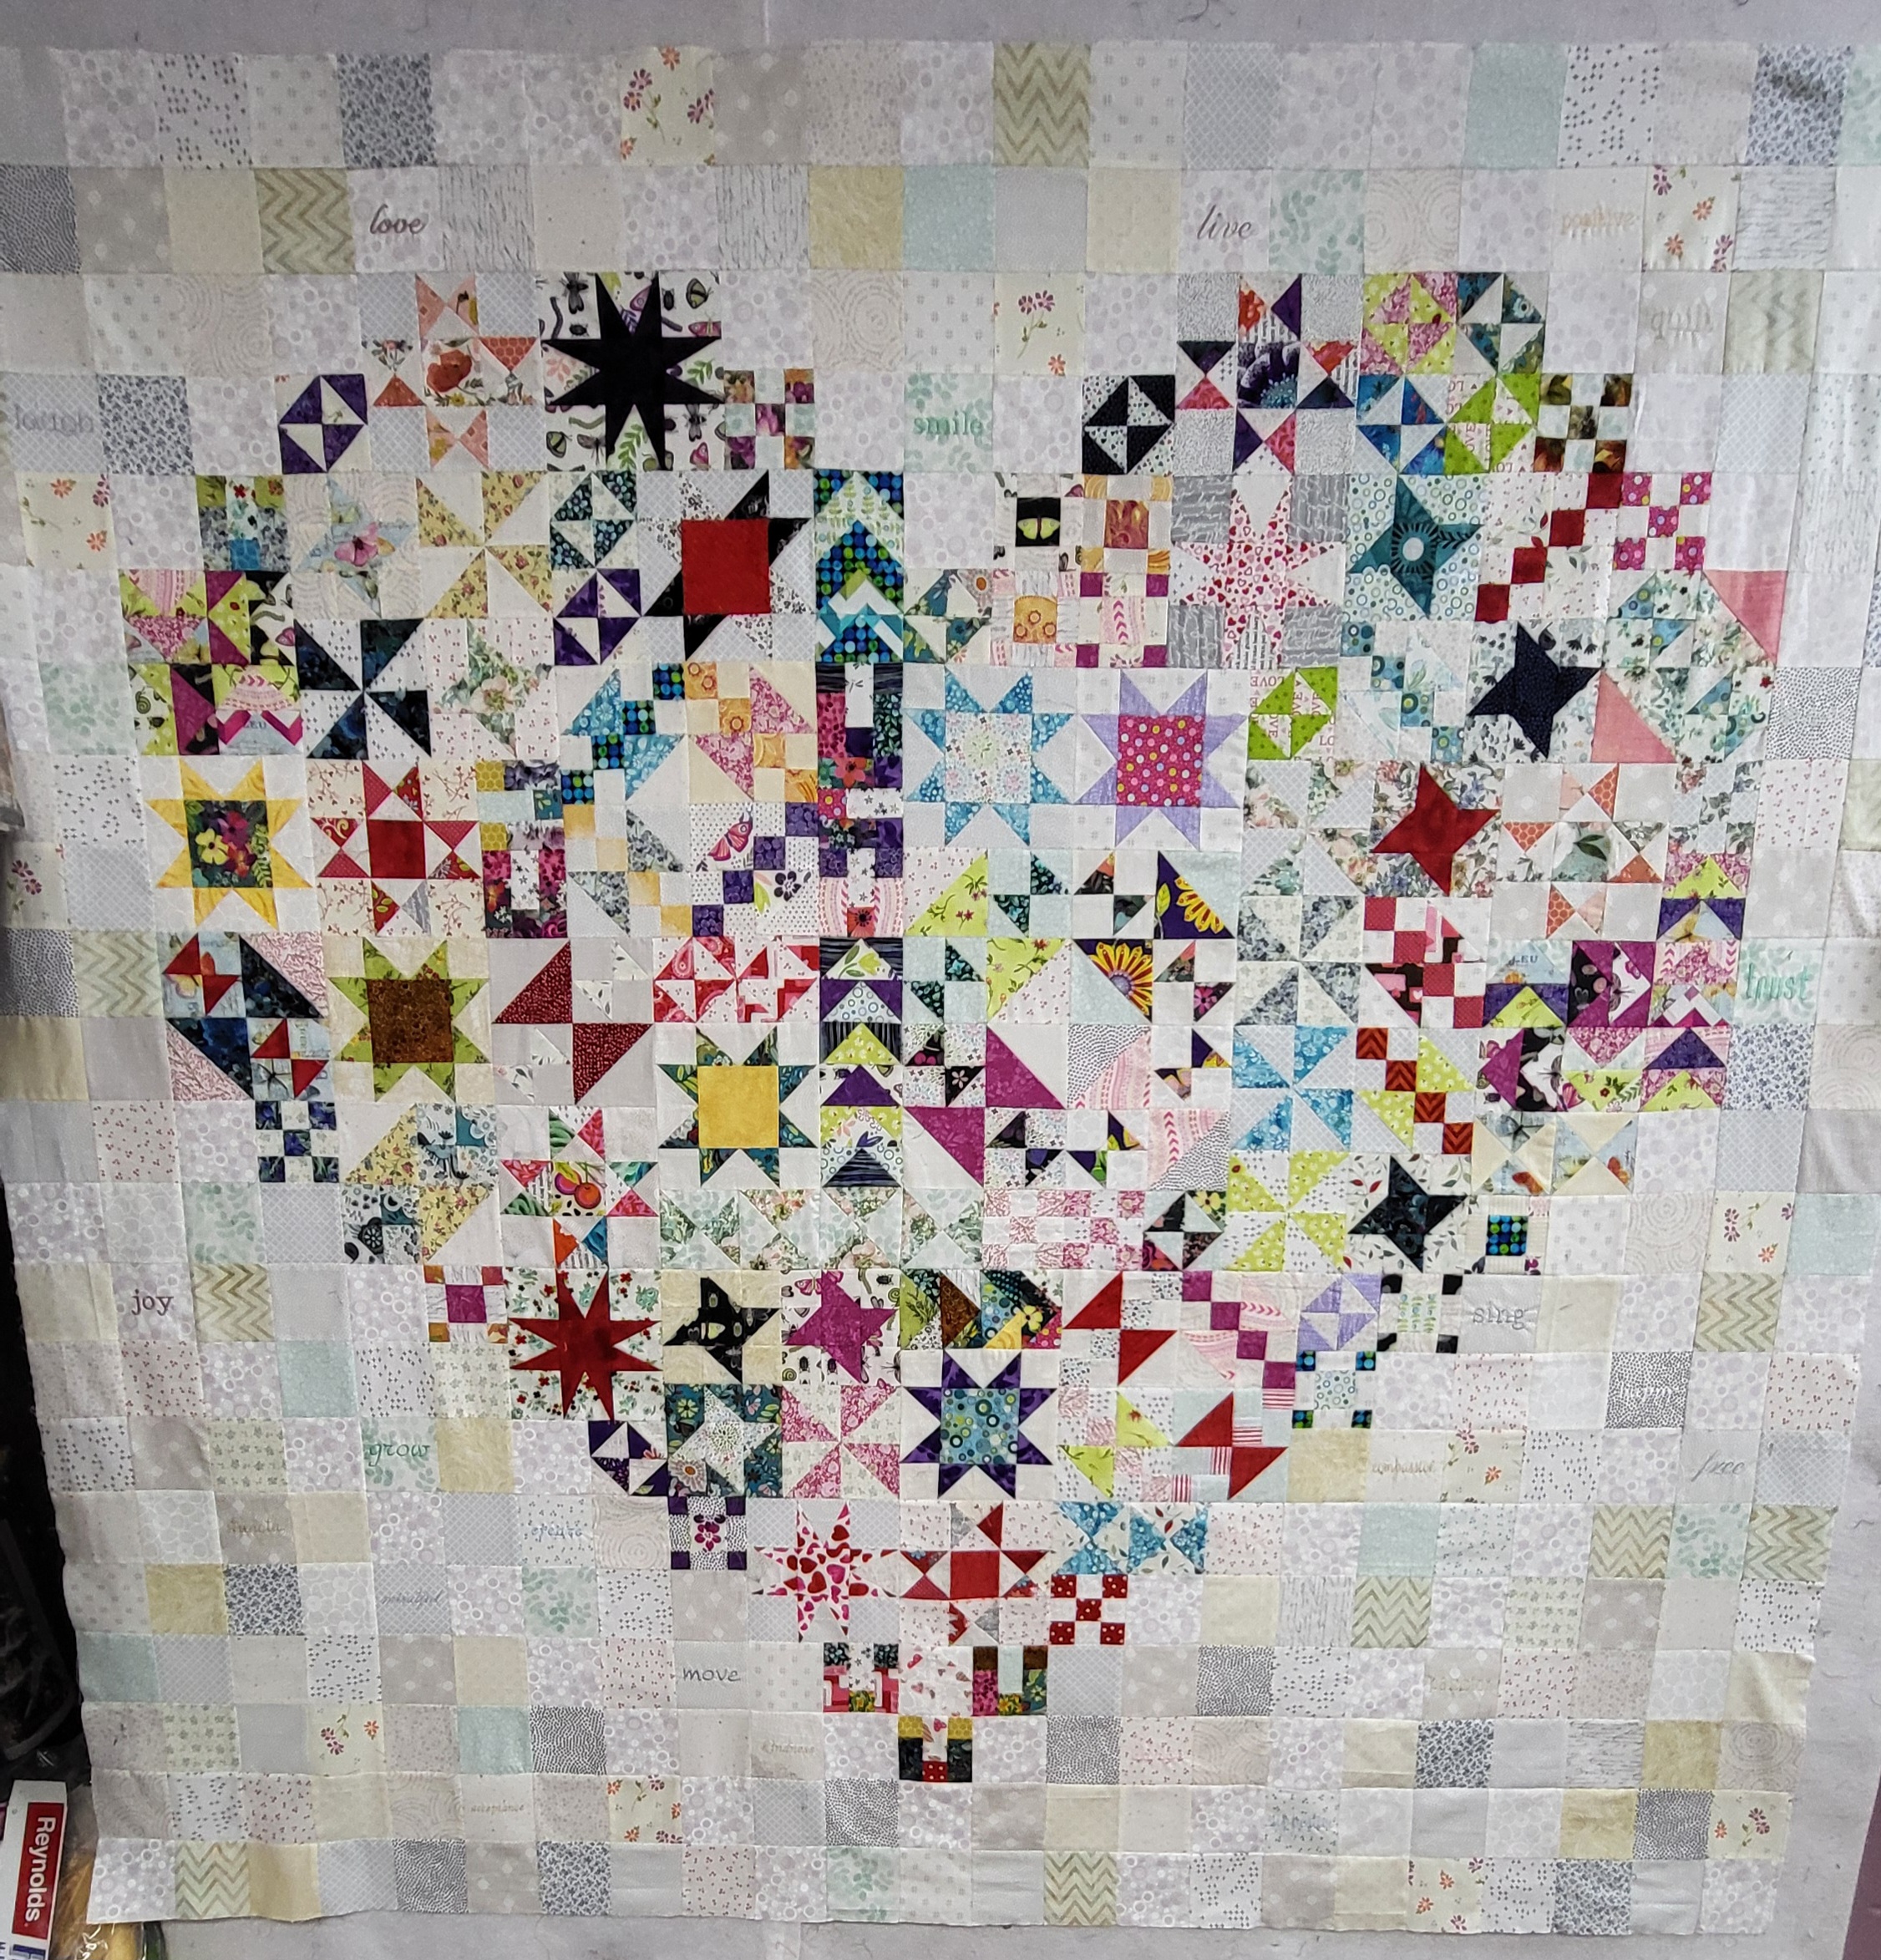
Here is my quilt. I went with BROWN and, for the most part, only used my scraps. I had to dig into yardage to get enough squares for the background, and some of those squares are not exactly in the brown family, but that's OK. I attached the final two borders this morning, so the top is officially done. I learned a lot while adding the lettering using machine embroidery applique.
It's the quote that gets me excited because it's how I look at everything I do!
 |
| Elaine |
That makes TEN quilt tops that are done. Yeah!!!
Now, let's have a peek at the quilts in progress. Some of the tops are so close to being done. I think this next one needs the lettering added to the borders, and then they can be sewn on. These fabrics are the leftovers from THREE previous projects!!!
 |
| Joanne |
Here's unusual coloring, but I love how the values change. When I looked at it this morning, it almost seems like we are looking into a window to see the heart. It's super creative, and there's no need for words. They will get lost in that border.
 |
| Darlene |
The blocks are all together, and assembly has begun. This is made with batiks and looks gorgeous. Well, anything with batiks is gorgeous - OK -- not everything!
 |
| Jody |
This one is made with Tilde fabrics and is very soft, but it is going to look amazing once it's together.
 |
| Kathi |
Here's a very unique coloring. It has a very modern vibe, and that added grey border makes it appear to be floating off the background.
 |
| Nancy |
That makes five tops that are very close to completion. That accounts for 20 of the 29 people in the class.
I know four are still working on piecing their blocks, and I had five people monitor the class, so that was a pretty good turnout!
I'm thrilled with the results, and it's always super fun to see how each person interprets the same pattern—changing colors or values, adding their spin to the borders, or the lack thereof. In this case, we also had the words.
Thanks to everyone who signed up for the class—it was great fun. And YES, there will be another one in the fall. It's called Spice Market! So watch for more details later. I'm unsure where the picture is this morning, and I'm running out of time!!
I have two presentations this morning, and both are ready to go! But the girls and the boy will howl for their walk soon. I see it's raining again. Oh, joy!
Have a super day!!!
Ciao!!!!


No comments:
Post a Comment