The missing window has been located! Yeah! I was so worried that the issue I uncovered back in June hadn't been rectified, but I was sure that I scoured that contract before shelling out the money. When I returned from the morning walk, the guys were already hard at work in the garage on the window that had initially been forgotten. Phew -- that means the contract should be OK.
The missing window was in the warehouse, and it was a challenge to keep them all straight when they had so many windows! But we are good to go.
All the windows are now done upstairs; at least, I think they are entirely done, and they managed to get the window in DH's office done while he was away yesterday. Thank you, Pella installers!
Since most of the remaining windows upstairs were in the same room, they could work much faster and got SEVEN windows installed yesterday.
 |
| Windows at the back of the house |
Today, all that remains are the four windows along the back of the house and my office. Yes -- I have to move some crap to make that happen. It's actually not that bad - the table is already moved, and my computer desk is on wheels. I just have to remove the stuff off the second desk and get someone to help me move that.
I moved the couch in the living room. OH! We don't move it that often as there was a LOT of dust behind it. I found a couple of dog bones, a lip balm, some change - not enough to buy a coffee, and a bookmark.
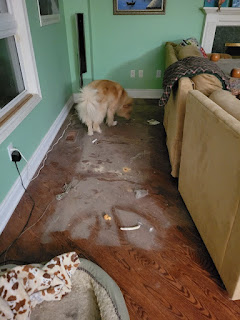 |
| Murphy checking out the dust behind the couch |
The dust in the house is terrible! My nose is not happy, but I'll survive. But I tell you, the whole kerfuffle thing makes me want to dismantle EVERY room one at a time, wash the walls down, redo the electrical where necessary and paint everything. And then, before everything goes back into each room, it gets culled down to only what we need.
I know I can't make that happen, but I'm going to start looking at making those things happen. This is just silly to ignore the rest of the mess. I've got the name of an electrician and a painter, and well -- we should bite the bullet to make it happen. If we ever sell, well, we will one day, but we should enjoy the house in a clean state before we do that.
The girls have been really good. Murphy pretty much ignores the guys as they come in and out the doors. Lexi does as well, but they are definitely missing their carpet in the front room. So Lexi made herself right at home among the tools last night. Oh, Lexi!!! I laid her carpet out in the corner, and hopefully, she'll be good.
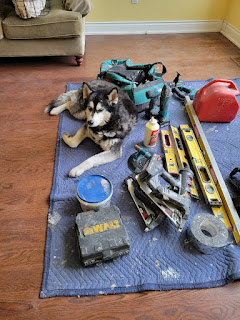 |
| Lexi amongst the tools |
I managed to get my barn block done - just in the hick of time. It has sat on the cutting table for the entire month, and I didn't touch it. But now it's done, and amazing what a deadline will do to us. No time to lay out the rest of the blocks - you'll have to wait until next time. I'm not sure that I'll use this block -- I'm going to use the symmetrical blocks for my quilt, but the extras can go on the back. Or be used for something else. That is being hosted by
Thimbles and Things.
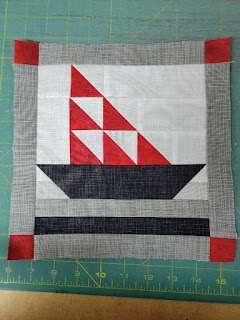 |
Barn Quilt block
|
I might just work on the next block during the Virtual Retreat this weekend. And I actually had some time to do some stitching on my Enchanted Autumn quilt. I almost got this block done this morning. Just three pieces on the flowers and the red circles to go. I'm pleased with that progress. I think I'll be working on this at the Virtual Retreat as well.
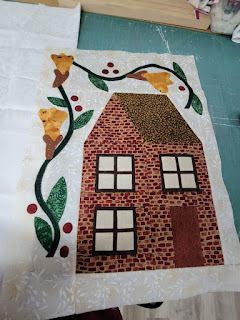 |
| Houe block for Enchanted Autumn |
I'm using a blanket stitch with 40-weight embroidery thread, and my machine works like a charm. I MUST get cracking on this quilt as I'd like to have it finished by the end of the year.
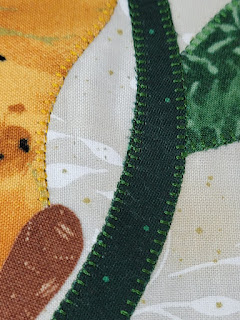 |
| The blanket stitch on the Enchanted Autumn block |
Here's one thing about having work people in the house. I didn't feel like I could leave them alone. I could, but not with the dogs. So I was trapped in the house, and I really needed to get to Staples to pick up something. I also had to get something printed, and I'll share that with you tomorrow.
While I was there, I picked up more label cartridges. So yes -- I can label to my heart's content now with my AC Adapter and my labels. I even got one for the cords!
 |
| More label cartridges |
This is what I dropped off at Staples the other day. I had them cut the spine off and put on a coil binding.
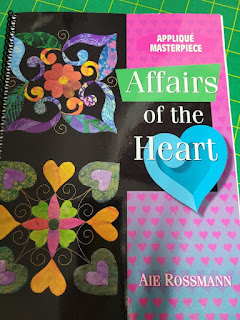 |
| A quilting book with the spine replaced with a coil binding |
So why did I get that done? I've wanted to make this quilt for a long time, but there's a lot of work in the quilt, and I don't think I even got one block done.
Hold that thought while I tell you about my huge learning curve last week.
A couple of years ago, Ronda purchased this pattern, and we were both so excited. We thought it was machine embroidery applique, but it turns out that it was only the traditional applique patterns that you trace.
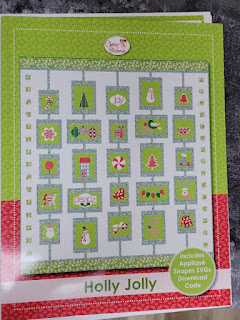 |
| Holly Jolly by Cherry Blossoms |
It did come with a code that you could use to download the .SVG files if you have a digital cutter.
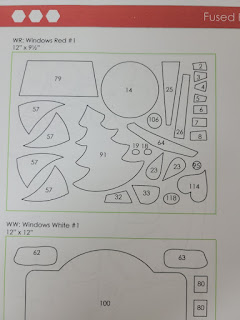 |
| Images of the .SVG files included in the pattern |
When we realized this, I said the pattern could be converted to machine embroidery applique using embroidery software. As you know, my goal has been to learn that software, but it takes some time. As I've become more comfortable, I felt I was ready to FINALLY tackle this job.
I'm using the
mySewnet Embroidery Software. And if you have the subscription, a new version was released yesterday. Get the latest download!! Even if you don't have the subscription, there is a new release for the perpetual version, with a couple of enhancements and bug fixes.
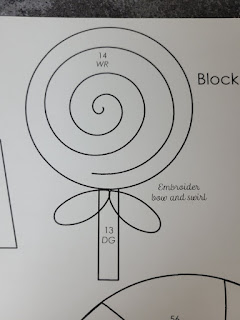
I started off by scanning one of the simpler motifs.
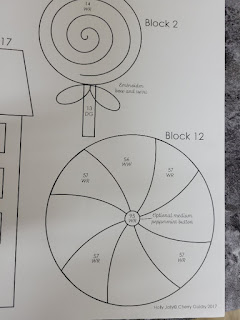 |
| The original motif |
I started by removing all the writing on the diagram and isolating just the pinwheel into one image.
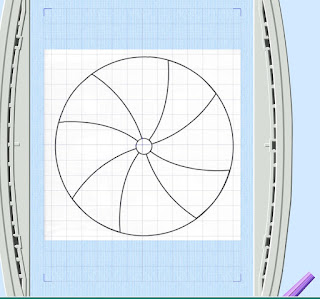 |
| The clean image in the software |
Then I ventured into the DIGITIZING wizard on the software. ACK -- this is scary stuff! Actually, it's not that bad, as I've been messing around with it because I wanted to show the classes I'm teaching the possibilities. This software is so easy because there are oodles of options to choose from based on what you are trying to do.
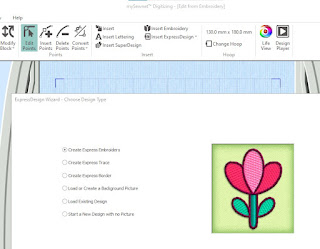 |
| Options when you open the Digitizing Program |
OK -- so how hard can this be? I managed to get the image filled in, but with THREAD, not fabric, and the colors were off.
 |
| The first attempt resulted in a fill pattern with thread |
I played around with various options and colors.
 |
| Different colors |
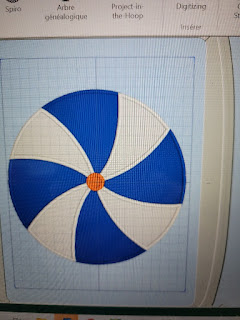
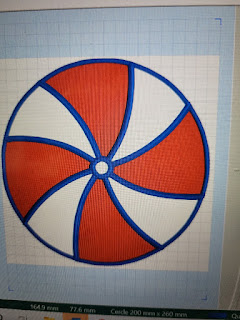
So this is a bit closer to what I wanted.
 |
| Red and white swirl - getting closer |
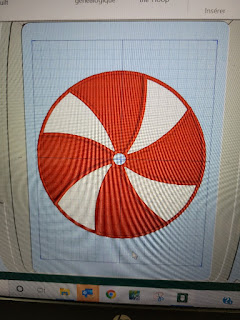
Although it's hard to see, I managed to get rid of the thread fill pattern and substitute it with applique fabric.
 |
| Now the inside is filled with fabric, not thread |
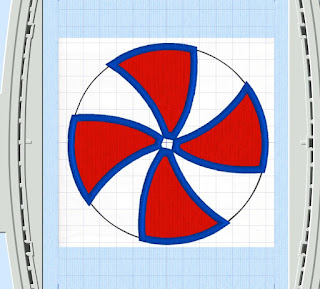
I got to add in the second color of applique fabric. OH MY -- this is super easy once you get the hang of it.
 |
| Adding in the second applique fabric |
The big test was whether I could replicate the process to explain it to someone else, and the answer is YES - I could do that. Yipppeee!!!!!!
Then I sent the file to the Husqvarna Viking Designer Ruby 90 via the Wi-Fi and the mySewnet cloud. I love that!!!!
And there it was -- stitching out my FIRST effort at machine embroidery applique.
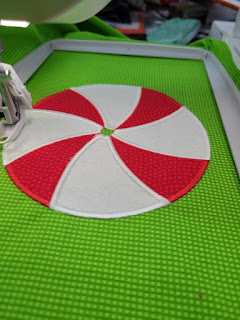 |
| The embroidery design is being stitched! |
Now I still had some stuff to learn as it worked on EACH blade one at a time, and that's not how I wanted it to be. I wanted to do all the placement lines for the red, then the tacking stitches, and finally the satin stitch. Then move on to the white.
After my first one was stitched out, I played with the menus (which I find pretty intuitive) and figured out how to make that happen. I've just got one more thing that needs to be changed before calling the design ready. The way I have the design programmed, it did a satin stitch around each shape individually, instead of just where it would be visible.
I believe I have figured that out but have had no time to make it happen.
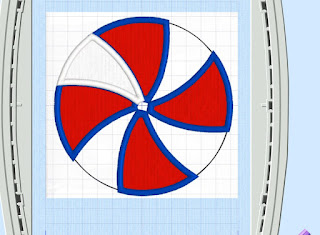
And here is my final design. I'm pretty darn happy with that. And the more I do, the easier it becomes.
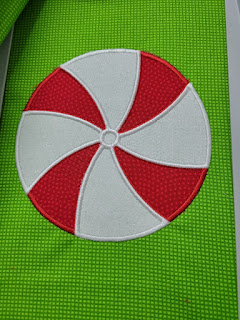 |
| The final motif |
The following design is a bit more complicated. There is machine embroidery applique, but embroidery sits on the applique or, in the bow, a shape and then lines.
 |
| A more complicated motif |
Hmmm -- I tried a couple of things, and nothing worked as it should. Then I took a look at the menu again, and what are these buttons? OH MY -- I think I figured out how to do it - in layers -- of course, it has to be done in layers. Shoot -- no time to deal with that yet, but I think I can make this one happen pretty quickly as well now.
If you've been following my story, you can now guess what I want to do with the book I had coil bound at Staples. Yep -- my goal is to create a Machine Embroidery Applique pattern from the designs in the book. It will be a super exercise, but I won't tackle that one until I finish the Christmas one for Ronda.
It's all in the essence of learning something new every day, and this was a bit of a learning curve. And while I've cracked another element of the software, I'm by no means an expert and still have a long way to go before I would know how to do anything. I'm not sure that I have the skill to digitize something entirely from scratch, but hey -- never say never!!!
Anything is possible, and I say - bring it on!!!!
To help out a local high school student with a project she is working on, I participated in an interview with her yesterday. She asked some very interesting questions and one of the most challenging questions was "do you consider yourself a craftsperson or an artist?" Hmmm - how would you answer that question? I won't tell you what I said.
Anyway, a lot of stuff got done on my TODO list. I finally got the confirmation for the Free Motion class out the door. Yeah! Now there are four more lists to make up and send out. I won't have time for that today as I'm having a play date and you'll get to see that tomorrow.
On that note, I must get the girls out for their walk as I have my barn quilt meeting at 8:30 and the workers will be here at the same time and there's still furniture to move.
Don't forget the Virtual Retreat this weekend. For those of you, who have never attended a Virtual Retreat, it's just like a sewing day, but instead of sewing alone or in person with others, we open up the Zoom link and you can come and go as you see fit. Loads of fun and we talk about everything and anything!
Have a super day!!!
Ciao!!!!
I think your idea of going through each room is a great idea. And…I can identify with:
ReplyDeleteIf we ever sell, well, we will one day, but we should enjoy the house in a clean state before we do that.
SW and I did so much work on our home in Guelph before selling it to move permanently to our “home north”. SW’s comment: “We just get the house the way we want it, and now we’re selling it.” Something I suggested we keep in mind in this, our forever home 😊
Absolutely you should enjoy your home just the way you want it. I am consistently amazed when people do all the "upgrades" and then sell. Why weren't they worth it? (I despise the word upgrade BTW ;-)
ReplyDeleteWe're joining you in 2022. Time to raise the sunken living room so that when we're old there is no fall/trip hazard. Then it's paint, new floors and replacing 4 windows in that room. I'm ready but the builders are too busy on new construction to take on our 'small' project-we've been waiting for 2y already!