 |
| Came home from class and dumped all the bits and pieces on the table - now to sort it out so it makes sense!!!!!!!!!! |
Let's start with cutting Template K - which is the piece that goes on the outside of the fan block
 |
| Start with rectangles of background - 5" by 6 1/4" (I cut two layers at a time) |
 |
| Line the 5 inch mark of the ruler along the left side of the rectangle - make a ONE INCH cut along the bottom right of the ruler |
 |
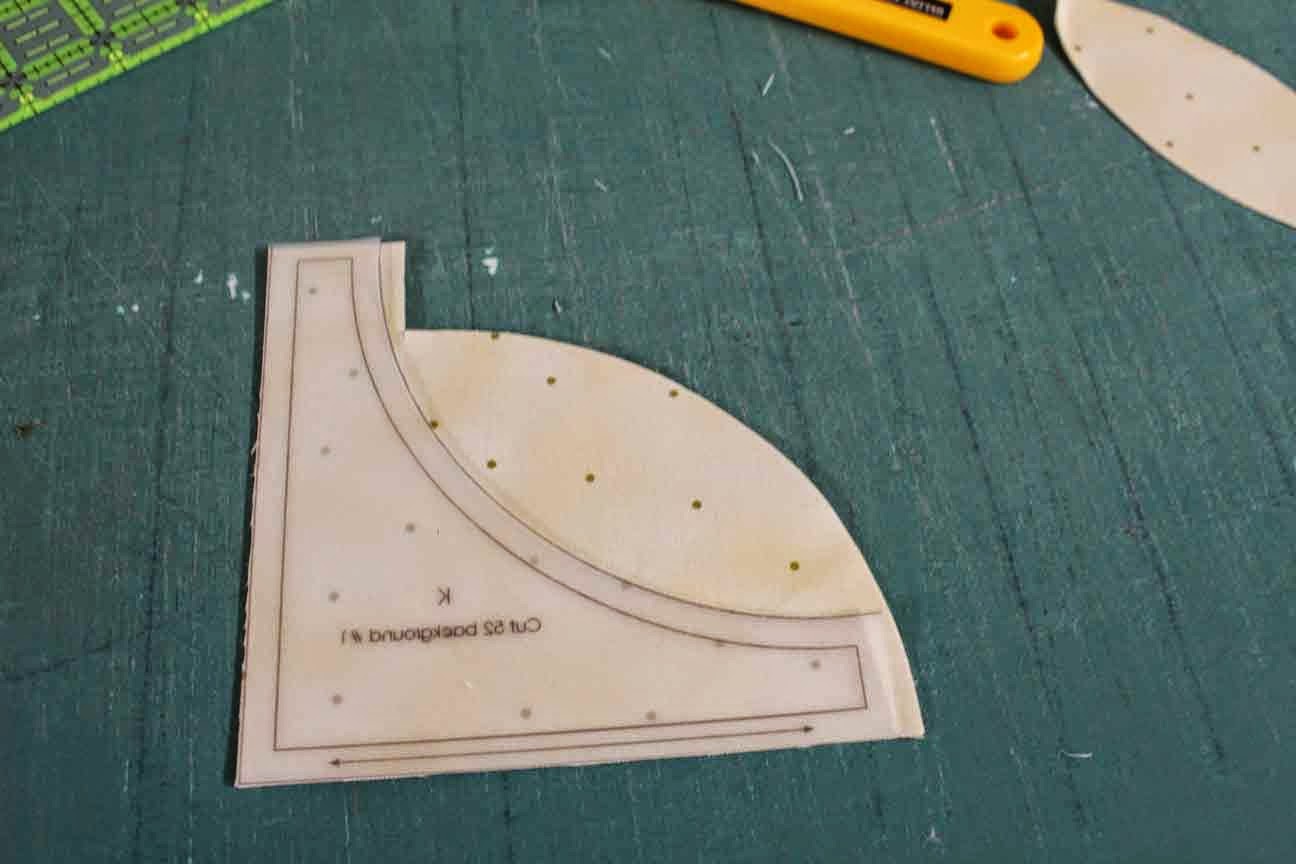
| Place your template K on the rectangle and cut along the curved edge |
 |
| Now the piece is cut - you can see where the one inch cut is at the bottom right of the template |
 |
| Turn the remainder of the rectangle around and place the K template on the piece |
 |
| Cut on the curved line |
 |
| Then line the ruler back up - the 5 inch line on the ruler is lined up on the left side of the rectangle |
 |
| Cut off the little bit and you get another piece cut. |
When I cut these pieces - I cut through two layers of fabric so it made it faster to cut. I found cutting this way a bit easier than using the template for the small straight edges and less danger of shaving the straight edges off the template.
 |
| So each rectangle will yield two pieces template K, a melon shape which you can keep for applique on another project and two little bits of scrap. |
Now lets move onto trimming the fans.............
 |
| Fan that needs to be trimmed |
 |
| I free hand cut the top off using a rotary cutter - use scissors if you feel more comfortable |
 |
| I rotated the fan around (I'm right handed - it just works easier this way) |
 |
| I free hand cut the inner part of the fan |
 |
| Then using a ruler - trim off the two straight edges. The outer edge of the fan should line up with the 4 1/2" marking on the ruler. The inner circle should line up with the 2 inch markings on the ruler. |
 |
| I used the small rotary cutter for all the cuts! |
Now let's sew that curved seam
 |
| Take one fan trimmed, but still with the paper on and one template K. FInd the center of both (the center of the fan should be the seam) and pinch press the template K to find the center. Match them up and pin |
 |
| Then swing the leg of the Template K around so that you can match up the straight edge with the straight edge of the fan - stick a pin in |
 |
| Swing the other leg of Template K around and match the straight edges - PIN |
 |
| See how the bias edge of the Template K just falls into place on top of the fan |
Let's sew it together.............
 |
| I use a small piece (leader) to get the machine started without making a mess at the beginning and yes I stitched right over the pin |
 |
| Here is my stiletto in hand to control the two fabrics and keep them in line.The stiletto serves the same purpose as pins, but takes a lot less time |
 |
| Approaching the center pin - no buckling. If there is - then you need to fix that before you sew the other half |
 |
| Moving onto the second half of the curved seam. See how that stiletto is keeping things under control |
 |
| And keep things under control until the very end. Do NOT let go of the fabric near the end - you must control the width of that seam right to the end |
 |
| And there is the stitched piece |
 |
| And from the paper side |
 |
| Press the seam away from the fan |
 |
| Wrong side |
 |
| Now you can remove the paper - start with the paper in the seam allowance |
 |
| Then take the rest out |
 |
| The curved seam - done!!!! |
The next step is to applique the center. I ran into computer problems today, but now they are fixed so I will try to get the next step up tomorrow.
Hope this helps
Have an awesome day!!!!!!!!!!!!
Ciao!!!!!!!!!!!
No comments:
Post a Comment