I did actually FINISH THREE projects - yes they were small but they are MINE and they are DONE.
I got the borders/bindings/backings done on FOUR projects - yeah
I made THREE senior lap quilts for the guild
I made NINE blocks for various exchanges
I quilted THREE customer quilts
And I made GOOD headway on my 12 for (20)12 January project. It is waiting to be basted. Someone mentioned to me that they may NOT finish their 12 projects, but they will make significant advances to them. I'm like that!!!! But I do hope to get it quilted and bound soon. If you want me to post a picture of your project - don't forget to send it to me and I'll post it. I have several and will try to do them all at once.
Let's not forget all the blocks for the various classes and samples and whatever that I have worked on.
I feel pretty good about all that - just wish it was more. There is SO MUCH more to do.
But enough about that - let's chat some more about applique.
I see that I had already put together a tutorial for starch applique and it includes all the details about stitching it down by machine. Check out this link below if you want that info for the stitching by machine, otherwise - I am going to cover the hand stitching tomorrow.
http://crazyquilteronabike.blogspot.com/2011/04/tutorial-applique-preparation-starch.html
Today we are going to talk about making perfect appliqued circles........
 |
| The tools - fabric for the circles, pencil, Perfect Circle templates by Karen Kay Buckley, starch, stencil brush, Roxeanne's Glue/Baste it, sharp to the point scissors, needle and thread |
 |
| Perfect Circles by Karen Kay Buckley - made from heat resistant mylar |
 |
| Place the template on the wrong side of the fabric and lightly trace around it with a pencil |
 |
| Cut out the circle leaving a less than 1/4", but great than 1/8" seam allowance |
 |
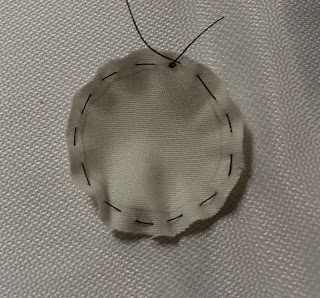
| Put a knot in the end of the thread (I am using contrasting so you can see, but not necessary). Stitch a gathering stitch in the seam allowance - there are NOT ENOUGH stitches in the above sample |
 |
| This is more like it |
 |
| Paint the seam allowance with starch and place the template inside the gathering stitches |
 |
| Pull up the thread and using the iron - press that seam allowance . Make sure you hold that long thread tight to keep the gather tight |
 |
| Press from the front as well |
 |
| Let it COOL - this is very important |
 |
| Then very gently release the stitches and pull out the template |
 |
| The finished circle - note this one has some lumps and bumps on it - that is because the gathering stitch was too big and I did not wait for it to cool before I removed the template. |
I will cover hand stitching tomorrow.
Remember I said I picked up a small project when I was at the Red Red Bobbin last week. Well here it is.
 |
| It's a Quilt Police doll - front |
 |
| Back |
It is pretty funny and the store had added a red ribbon as a sashing (as in NO QUILT POLICE), but I didn't bother - I was going to sew it on after I had the pillow stuffed, but decided it was OK like this. I should have put a hanging loop at the top. Well I can just sneak something onto it so I can hang it up.
Zebra Patterns
I must go - I have a LOT of paperwork and quilts to get done today and if I don't start, I will get distracted very easily.
Have a great day!!!!!!!!!!!!!!!!!!!!!!!
Ciao!!!!!!!!!!!!!!!!!!!!


Sit down, please! Have a cup of tea!
ReplyDeleteThanks for the reminder. I've 28 dots (2.25 inch circles) to prepare for the border of the BOM I was working on the other week.
ReplyDelete