We had Monday sewing yesterday, and I was so productive, but you'll hear about that tomorrow.
Today, it's all about the show and tell from one of the sew-alongs at the Hobby Horse. We started the class in January and finished in July. There were some very new quilters in this group who did an AMAZING job at finishing their quilts!
Let's have a look.
Here's the book we used.
 |
| Among the Stars Again by Its Sew Emma |
Here's something to think about -- I encourage the students to change up the pattern if there is something they don't like. Even though this is a 100% pieced pattern, they didn't disappoint.
There were 16 people in the class, and I think we got an almost finished quilt or a finished quilt top from everyone! That's very impressive.
First up is Cathie, who used a Christmas collection for her quilt.
.jpg) |
| Cathie |
 |
| Cathy |
.jpg) |
| Darlene |
.jpg) |
| Donna |
.jpg) |
| Jennifer |
.jpg) |
| Judy |
 |
| Karen |
 |
| Kelly blocks |
 |
| Lucy |
 |
| Some of Margaret's blocks |
.jpg) |
| Maria |
 |
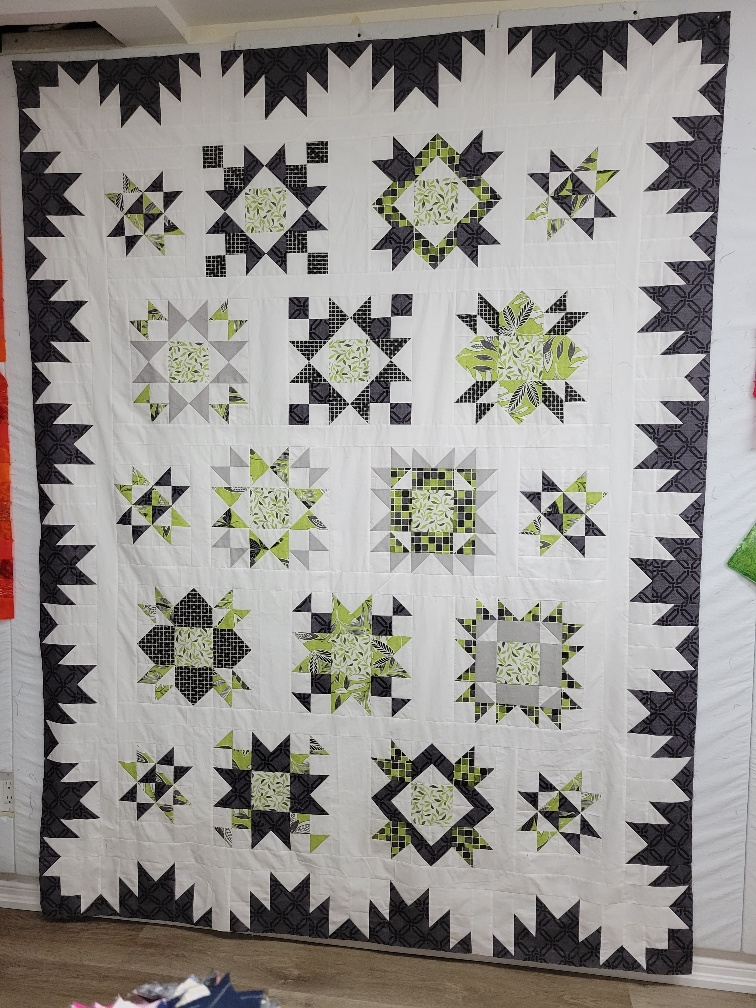
| Sandi |
 |
| The borders on Sandi's quilt |
 |
| Shelly |
 |
| Val |
 |
| My quilt |
However, I will confess that when I saw what Sandi did with her quilt, I really liked the effect of making that border more pronounced by adding a little bit of the same fabric to the edges. Remember, that grey is the fabric I plan to use for the binding, and I didn't have enough. However, now that I have found the fabric and had some of it left, I could cut 2" strips and sew them on.
.jpg) |
| The extra border added |
I have to say that I like this version much better! Thanks to Sandi for that! See -- I learn as much from my students as they do from me!
If you counted, one person audited the class and didn't make any blocks!
Now I need to contact the store that has the binding and get them to send me a bit more than I originally requested (good thing, the store owner couldn't attend to it until this week!), and then I'll have this one ready to quilt as well. More on that tomorrow!
Next week, I'll post ALL the classes and clubs I have on my list to teach in the fall of 2022 and 2023. There will likely be a few one-time or two-part classes that haven't been decided yet, but you'll get to see which sew alongs I'm teaching. All of them will be on Zoom!
Some of you might be saying, I don't need another quilt, and that's probably true, but we are MAKERS, and makers gotta make! If you want to be part of the group and have fun because that's what it's all about -- I don't teach rocket science in my classes, and a lot of people know just as much as I do, but we're all together for fun!
And if you don't need another quilt, do what Margaret is doing -- make blocks, change the size of the quilt, and donate them. One of the other ladies in this class will donate the entire top (or the finished quilt). She doesn't need another quilt, but she enjoys making it, and let's face it -- we have loads of fabric that needs to be dealt with. I think it's a fantastic win-win!
Plus, making stuff is cheaper than therapy; we get to chat with each other, tell stories, and learn from each other! I love it!!
On that note, I'm out of here. I did not get out on my bike yesterday, and I'm not sure about today. I have some urgent paperwork to do and I'm on a roll in Studio B, and I don't want to interrupt the momentum!
Have a super day!!!
Ciao!!!
Gorgeous finishes! I love seeing how different they all look.
ReplyDelete